DIY Yarn Wreaths – 10 Inspiring and Stunning Ideas to Beautify Your Home
DIY yarn wreaths are a charming and creative way to add a personal touch to your home décor. These wreaths, crafted from yarn, can be customized to fit any season, theme, or personal taste, making them a versatile choice for decorating doors, walls, or even as centerpieces. The process of making these wreaths not only allows for artistic expression but also offers a relaxing and enjoyable crafting experience. Whether you are a seasoned crafter or a beginner, DIY yarn wreaths provide an accessible project with stunning results. The beauty of DIY yarn wreaths lies in their simplicity and the endless possibilities for customization. By selecting different colors and textures of yarn, crafters can create pieces that range from elegant and understated to vibrant and festive. The basic materials needed for these wreaths include yarn, a wreath form, and any desired decorations such as ribbons, flowers, or seasonal embellishments. This article aims to guide you through the process of creating your own yarn wreaths, offering inspiration and tips to make your project a success.
Starting your journey into making DIY yarn wreaths begins with understanding the basic techniques and gathering the necessary supplies. Once you have chosen your yarn and wreath form, the process of wrapping or weaving can commence, gradually transforming these simple materials into a work of art. The satisfaction of creating something beautiful by hand is a rewarding aspect of this craft, providing a sense of accomplishment and a unique decorative item that reflects your personal style. Looking into the world of DIY yarn wreaths opens up a realm of creative possibilities. From seasonal designs that celebrate holidays and changes in the weather to themed creations that showcase your hobbies or favorite colors, these wreaths can be tailored to suit any décor need. As we delve into the various techniques and styles available, you will discover how easy and enjoyable it is to create these eye-catching decorations for your home or as gifts for friends and family.
The Basics of Making DIY Yarn Wreaths
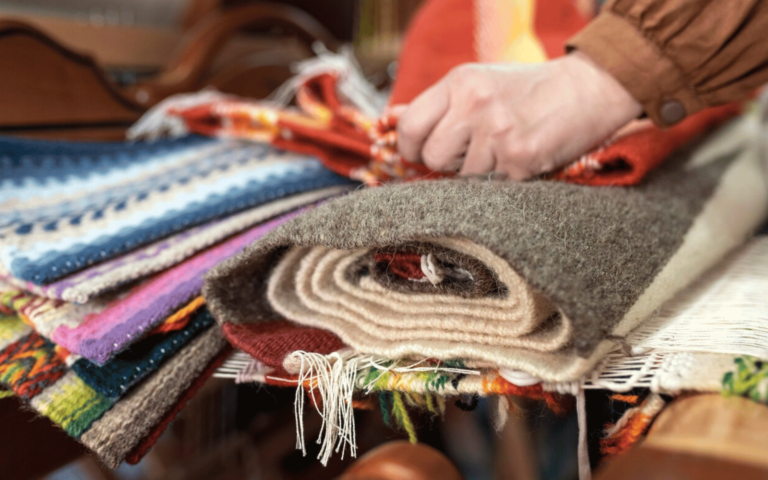
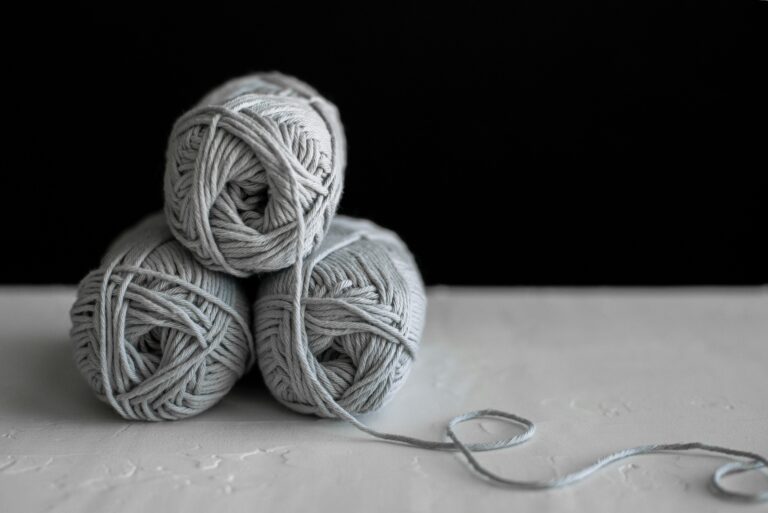
Embarking on the creation of DIY yarn wreaths starts with selecting the right materials. The choice of yarn is pivotal, as it determines the texture, color, and overall aesthetic of the wreath. Yarns come in a myriad of varieties, from soft and fluffy to sleek and shiny, each offering a different look and feel. Alongside yarn, the wreath form serves as the foundation for your project. common sorts include foam, wire, and straw forms, each suitable for different styles of wreaths. The initial step in making a wreath is preparing the yarn and wreath form. Cutting your yarn into manageable lengths or deciding to wrap the yarn directly from the skein are decisions that will affect the ease of the project and the final appearance. The wrapping process involves securing the yarn’s end to the form and then wrapping it tightly around, ensuring even coverage and a secure base for further decoration.
As you progress with wrapping or weaving the yarn around the wreath form, you will see the transformation begin to take shape. This stage is for setting the tone of the wreath. A tight, even wrap results in a neat and orderly appearance, while a looser wrap can create a more rustic, textured look. Patience and attention to detail during this phase will pay off in the quality of the final product. Once the base layer of yarn is complete, the wreath is ready for embellishments. This is where your creativity can shine, as you select decorations that complement the yarn and theme of the wreath. From natural elements like pinecones and dried flowers to festive ornaments and ribbons, the options for personalizing your wreath are limitless. The addition of these elements can transform a simple yarn wreath into a stunning piece of décor that captures the essence of a season, holiday, or personal aesthetic.
Creating a Simple DIY Yarn Wreath
Creating a simple DIY yarn wreath begins with selecting your materials. Choose a yarn that reflects the desired mood or theme of your wreath. For a cozy, autumnal wreath, consider warm, earthy tones and chunky textures. For a spring wreath, lighter colors and softer yarns are ideal. The wreath form, typically made of foam, wire, or straw, provides the structure for your creation. The first step in the construction process is securing the yarn to the wreath form. This can be done with a knot or a dab of hot glue, depending on the material of the form and the sort of yarn. Once secured, the yarn is wrapped around the form in a consistent manner, covering the entire surface. This repetitive process not only forms the basis of the wreath but also allows for a meditative crafting experience.
As the wrapping progresses, it’s important to maintain even tension on the yarn to ensure a smooth, cohesive look. Overlapping the yarn slightly with each pass around the form helps to cover the form completely without gaps. This technique also adds to the wreath’s durability, ensuring that it maintains its shape and appearance over time. The wrapping phase concludes when the entire form is covered, and the end of the yarn is secured with another knot or a dab of glue. With the base of the wreath completed, the embellishment phase begins. This is where your wreath truly comes to life, as you add decorations that reflect the season, occasion, or your personal style. Attaching items such as ribbons, artificial flowers, or themed ornaments can be done with hot glue or wire, depending on the items’ weight and the base material. The placement and choice of decorations are key to achieving a balanced and aesthetically pleasing wreath that will enhance any space.
Advanced Techniques for DIY Yarn Wreaths
For those looking to expand their crafting repertoire, advanced techniques in DIY yarn wreath making offer exciting challenges and beautiful results. Techniques such as weaving and the creation of tassels or pompoms introduce texture and depth to wreaths, allowing for more intricate designs. These methods require a bit more skill and patience but are well worth the effort for the unique and personalized wreaths they produce. Weaving yarn through a wire wreath form creates a rich, textured base that stands out from traditional wrapped wreaths. This technique involves cutting lengths of yarn and weaving them in and out of the wire form, creating patterns and depth. The woven approach is particularly effective for creating rustic or bohemian-style wreaths, as it allows for a mix of colors and textures that can mimic the complexity of natural foliage.
Tassels and pompoms add whimsy and movement to yarn wreaths, making them lively additions to any decor. Creating tassels involves wrapping yarn around a piece of cardboard, then tying and cutting it to form the tassel shape. Pompoms are made similarly but require a pompom maker or another piece of cardboard to wrap the yarn around before cutting and shaping. These elements can be made in various sizes and colors, offering endless possibilities for customization. Incorporating these advanced techniques into your DIY yarn wreaths not only enhances the visual appeal of your creations but also provides an opportunity to learn and understand new crafting skills. The satisfaction of completing a wreath that includes woven patterns, tassels, or pompoms is immense, offering not only a beautiful decorative piece but also a testament to your crafting abilities and creativity.
Decorating Your DIY Yarn Wreath
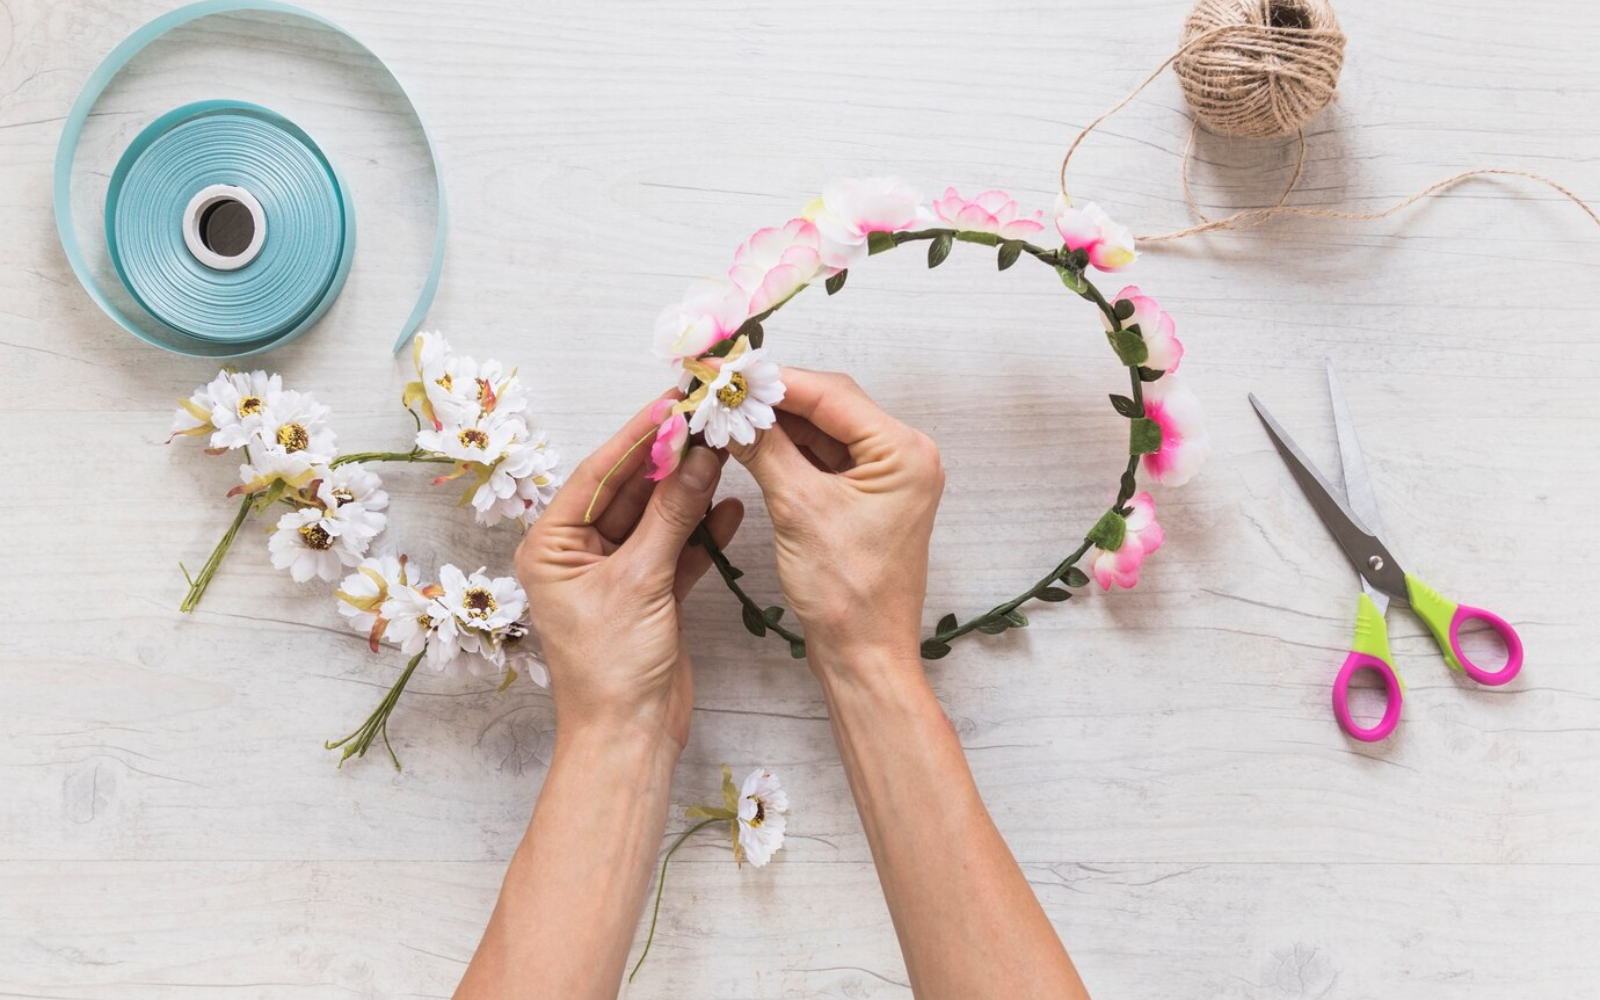
The decoration stage is where your DIY yarn wreath truly becomes a reflection of your personal style or the season. Selecting embellishments that complement the color and texture of the yarn base, such as silk flowers for spring or pine cones for winter, adds depth and interest. This phase allows for experimentation with layout and design, encouraging a creative idea of materials and themes. To achieve a cohesive look, consider a color scheme or theme before selecting your decorations. For example, a monochromatic wreath with varying shades of the same color can offer a subtle and sophisticated aesthetic, while a wreath featuring bold, contrasting colors can create a vibrant and festive focal point. Incorporating elements like ribbon bows, decorative birds, or even hand-painted ornaments can personalize your wreath further, making it uniquely yours.
The process of attaching decorations can vary based on the materials used. Lightweight items may be secured with floral wire or hot glue, while heavier items might require stronger adhesives or ties. Placement is key to creating a balanced and visually appealing wreath; arranging decorations asymmetrically can add dynamic interest, whereas a symmetrical layout can convey a sense of harmony and order. Finally, consider the location where the wreath will be displayed when selecting decorations. For outdoor use, ensure materials are weather-resistant to maintain the wreath’s beauty over time. Indoor wreaths offer more flexibility in materials, including delicate fabrics or paper goods that might not withstand outdoor conditions. Regardless of where it hangs, your DIY yarn wreath is a testament to your creativity and craft, welcoming guests with a personal touch.
DIY Yarn Wreaths for Every Season
The versatility of DIY yarn wreaths allows for year-round decoration, with the ability to customize each wreath to reflect the changing seasons or specific holidays. Spring wreaths might feature light, pastel yarns and floral embellishments, signaling new beginnings and echoing the blossoming world outside. Incorporating faux birds or nests can add a charming touch to these celebratory circles. Summer wreaths can capture the vibrancy of the season with bright colors and fun, beach-themed decorations like shells or nautical accents. This is also a perfect time for experimenting with bold, graphic patterns in the yarn wrapping or weaving, reflecting the energy and movement of summer activities.
As autumn rolls in, DIY Yarn Wreaths can transition to warmer tones, mimicking the changing foliage with hues of orange, red, and brown. Adding elements like artificial leaves, acorns, or even small pumpkins can celebrate the harvest season and bring a cozy feel to your decor. Incorporating textures, such as burlap or chunky yarn, can add depth and interest to these wreaths. Winter wreaths offer a chance to embrace the festive spirit of the holidays or the serene beauty of the snowy season. White, silver, and blue yarns can create a frosty look, while traditional red and green decorations celebrate the Christmas spirit. Adding lights or reflective elements can capture the magical glow of the season, making your wreath a beacon of warmth and joy in the colder months.
Creative Variations of DIY Yarn Wreaths
Looking into creative variations in your DIY yarn wreaths can lead to truly unique and personal decor items. Mixing yarn sorts within one wreath, such as combining smooth and textured yarns, can create visual interest and tactile appeal. This technique can highlight the versatility of yarn as a material and showcase your creativity. For a modern twist on the traditional yarn wreath, consider using geometric shapes as the base, such as squares or triangles. This approach can offer a contemporary feel to your decor, making a striking statement on your door or wall. Geometric wreaths can be especially appealing for those with a minimalist aesthetic or looking to break from traditional circular designs.
Incorporating unconventional materials alongside yarn can also elevate your wreath’s design. Materials such as metal, wood, or even recycled items can add an unexpected element to your creation, blending textures and materials for a mixed-media effect. These wreaths can reflect personal interests, from a love of nature to a passion for upcycling, making your decor not just beautiful but meaningful. Lastly, think beyond the visual by integrating sensory elements into your wreaths. Fragrant herbs, such as lavender or rosemary, can add a delightful aroma to your wreath, welcoming guests with not just visual beauty but a pleasant scent. Sound can also play a role; small bells or chimes attached to the wreath can gently announce visitors or add a whimsical soundtrack to breezy days.
Tips for Perfecting Your DIY Yarn Wreath
Achieving perfection in your DIY yarn wreath projects may seem daunting, but with a few tips and tactics, you can elevate your creations to new heights. Firstly, paying attention to the quality of your materials is . Select high-quality yarn that not only looks good but will withstand the test of time, especially if the wreath will be displayed outdoors. When wrapping or weaving your wreath, maintain consistent tension to avoid loose areas that could detract from the finished look. If you’re aiming for a perfectly smooth surface, consider using a foam wreath form that provides a uniform base for your yarn. For wreaths with more texture or a rustic feel, a wire form can offer flexibility and the ability to attach decorations directly to the frame.
Experimentation is key to discovering new techniques and styles that work best for you. Don’t be afraid to try different wrapping patterns, mix colors, or incorporate unusual materials. Each wreath is a learning opportunity and a chance to refine your skills. Remember, imperfections can add character and charm, making your wreath uniquely yours. Lastly, always consider the display location and method for your wreath. Ensure it is securely attached to its hanger, especially if it will face outdoor elements. Adapting your design to suit its environment, whether by choosing weather-resistant materials for outdoor wreaths or delicate textures for indoor displays, will ensure your creation can be enjoyed for as long as possible. Embarking on the journey of creating DIY Yarn Wreaths is not only an opportunity to beautify your space but also a chance to express your creativity and craftsmanship. With each wreath, you can search new techniques, celebrate the seasons, and create lasting decorations that reflect your personal style. Whether you’re crafting a simple, elegant circle or an elaborate, themed, the joy of DIY yarn wreaths lies in the making as much as the finished product.
Incorporating Natural Elements into Your DIY Yarn Wreaths
In the world of DIY and home decor, blending crafted elements with natural materials not only enhances the aesthetic appeal but also brings a unique, organic touch to your creations. When it comes to DIY yarn wreaths, integrating natural elements can transform a simple project into a captivating piece of art that resonates with the beauty of the outdoors. Start by selecting a base of soft, pliable yarn, choosing colors that complement the natural additions you plan to incorporate.
As you weave the yarn around your wreath frame, consider the placement of natural items such as twigs, dried flowers, or pine cones. These can be arranged artfully among the loops of yarn, secured with floral wire or hot glue to ensure they stay in place. The choice of natural materials should reflect the season or the specific ambiance you wish to create. For instance, spring wreaths might feature sprigs of lilac or cherry blossom, while autumnal designs can be adorned with acorns and dried maple leaves, offering a warm, rustic feel.
The texture of the yarn provides a cozy backdrop for these elements, highlighting their intricate details and colors. It’s important to balance the visual weight across the wreath, distributing materials evenly or creating a focal point with a larger, eye-catching piece like a large pinecone or a bundle of cinnamon sticks. This not only achieves visual harmony but also adds a tactile dimension to the wreath.
Moreover, incorporating natural elements into your yarn wreath does not only elevate its visual appeal but also invites a sense of calm and serenity into your home. It’s a subtle nod to the beauty of the natural world, bridging the gap between indoor and outdoor spaces. When hung on a door or wall, such wreaths serve as a gentle reminder of nature’s tranquility and the cyclic beauty of the seasons.
For those who enjoy a minimalist style, a simple yarn base with a single type of natural decoration can create a strikingly elegant piece. Alternatively, for a more lavish or festive look, combine multiple types of natural materials with richly colored yarns to craft something truly spectacular. The possibilities are endless and customizable to fit any taste or decor style.
To finish your wreath, consider adding a ribbon or a handmade bow at the top or bottom. Choose a material that complements the natural look, like burlap or a soft, earth-toned fabric, which ties the whole piece together and allows for easy hanging. As a final touch, spraying a light coat of clear protective spray not only helps preserve the natural elements but also gives your wreath a subtle sheen, enhancing its colors and ensuring its longevity.
Through the integration of natural materials, your DIY yarn wreath becomes more than just a decorative item; it becomes a personal expression of your creativity and your connection to the natural world around you. Whether you’re crafting for pleasure, decorating for a season, or creating a heartfelt gift, the inclusion of elements like wood, flowers, and foliage will lend a special, personalized touch to your wreath, making it truly one of a kind. Each time you pass by your wreath, you’ll appreciate not just its beauty but also the enjoyable process and thoughtful considerations that went into its creation.
See More At: woolen8wonders.com