Entrelac Knitting: A Step-by-Step Tutorial for Beginners
Have you ever heard of entrelac knitting but weren’t sure where to start? Look no further! In this step-by-step tutorial for beginners, we will cover everything you need to know about entrelac knitting. From the materials you need to how to cast on, knit the base triangles, pick up stitches, join the triangles, knit the rectangles, and finish your project – we’ve got you covered. So grab your yarn and needles, and let’s dive into the world of entrelac knitting together!
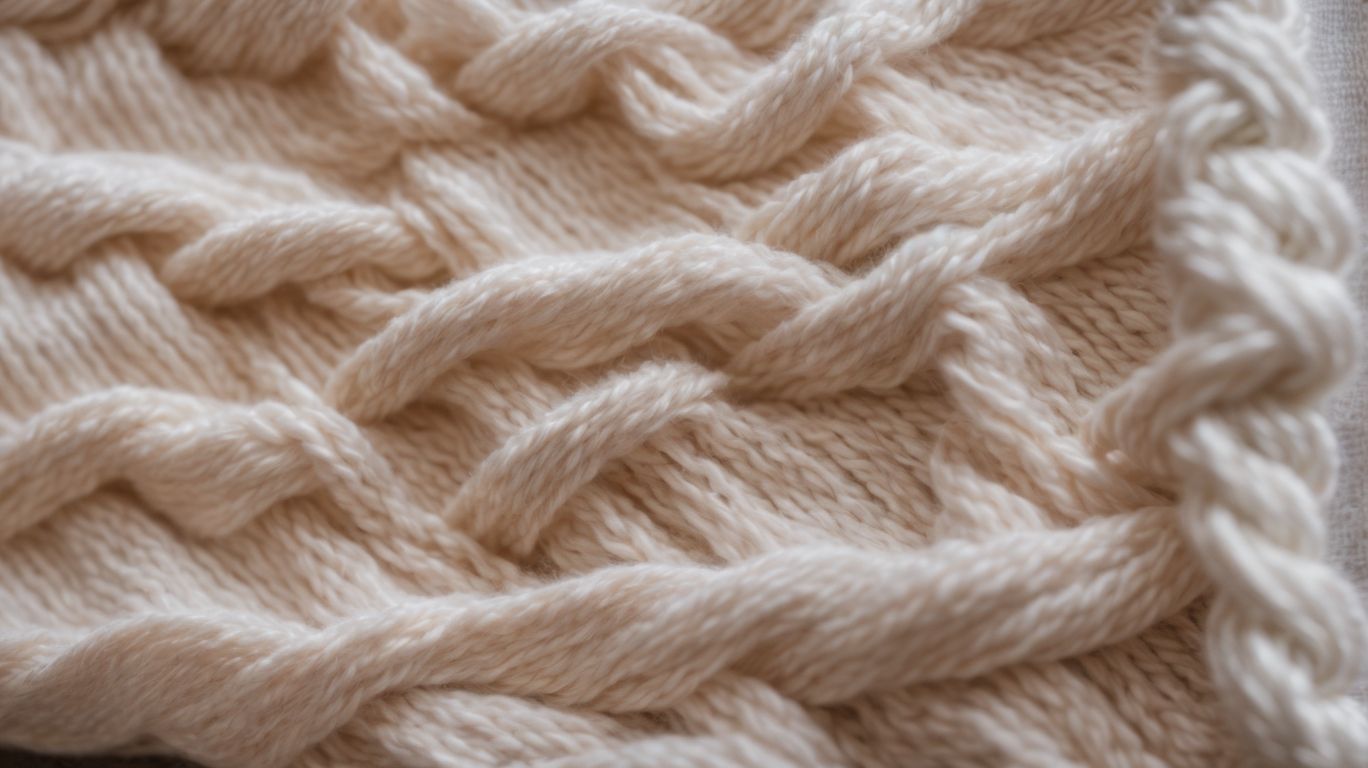
Entrelac knitting is a unique and captivating technique that creates a woven appearance by using base triangles and rectangles to form interconnected squares. This intricate method involves working each rectangle or triangle individually rather than the entire row of stitches at once, giving the final fabric a distinctive textured look. Entrelac projects often start with a base triangle, then stitches are picked up along one edge to work the first row of rectangles. The process continues by picking up stitches along the edges of these shapes, creating a visually appealing interlocking pattern reminiscent of a woven basket.
What Materials Do You Need for Entrelac Knitting?
To start your entrelac knitting project, you will need various materials such as yarn in multiple colors, knitting needles, and a pattern guide to follow for creating the entrelac rows. When choosing yarn for entrelac knitting, opt for wool blends or acrylic yarns that provide good stitch definition and are easy to work with. Needle sizes can vary based on your yarn weight, but typically, a set of US size 7 or 8 needles works well for most projects. It’s crucial to select contrasting colors for your entrelac design to make the unique interlocking squares stand out and create a visually striking pattern. The technique of entrelac knitting, combined with the right color choices, results in a captivating and intricate fabric with a dimensional look.
How to Cast On for Entrelac Knitting?
Before diving into entrelac knitting, mastering the cast-on technique is crucial to ensure a strong foundation for the subsequent rows of triangles and rectangles in the entrelac pattern. When embarking on an entrelac project, the initial cast-on sets the tone for the entire piece, determining its structure and stability as you progress through the intricate pattern. The way you cast on not only impacts the overall look of the design but also influences how smoothly the subsequent rows will flow. Precision and consistency are key, ensuring that each stitch is placed with care and attention to detail.
To begin, consider using a method that provides a firm foundation, such as the long-tail cast-on or the cable cast-on, as these techniques create a sturdy edge for the entrelac blocks. Remember, the first few rows of any project are crucial, and in entrelac knitting, this is especially true, as they dictate the shape and uniformity of the subsequent tiers of blocks. By focusing on a meticulous cast-on, you set yourself up for a successful entrelac journey, resulting in a beautifully textured fabric that showcases your skills.”
Achieving the perfect base for your entrelac knitting project requires selecting the ideal cast-on method, with options ranging from long-tail cast-on to provisional cast-on techniques as recommended by experts like Laura Barker. When opting for the long-tail cast-on method in entrelac knitting, you benefit from its versatility and stability. This method is widely favored for its efficiency in creating a neat edge that pairs excellently with the multidirectional nature of entrelac designs. Expert knitters such as Laura Barker emphasize the importance of maintaining an even tension while executing this cast-on, ensuring a uniform appearance throughout your project.
How to Knit the Base Triangles?
Mastering the art of knitting base triangles is the foundation of entrelac, involving the creation of right and left triangles that form the initial section of your entrelac project. When beginning your entrelac project, start by knitting a right triangle. To craft a perfect right triangle, increase stitches at one edge while keeping the other edge constant. This creates a diagonal shape. Next, move on to the left triangle, where you decrease stitches to form a mirror image of the right triangle. Focus on achieving symmetry and precision in both triangles to ensure a cohesive and balanced look in your entrelac design. Take your time to count stitches and rows accurately, keeping track of your progress to maintain consistency.
How to Pick Up Stitches for Entrelac Knitting?
Picking up stitches along the edges is a crucial step in entrelac knitting, allowing you to seamlessly transition between rectangles and triangles while maintaining the integrity of the pattern. When working on edge triangles, it’s essential to pick up stitches evenly and consistently to avoid puckering or loose fabric. This can be achieved by inserting the needle under both loops of the edge stitch to maintain tension and create a neat edge. For filler triangles, pay attention to the alignment of your stitches to ensure they follow the slant of the triangle for a polished finish.
Enhance your entrelac knitting expertise by mastering the optimal method for picking up stitches, utilizing visual aids and step-by-step instructions from entrelac tutorials to guide your technique. One crucial aspect to keep in mind during this process is the accuracy of your stitch pickups. Each stitch should be picked up precisely, ensuring uniformity and consistency in the pattern. Visual aids, such as detailed images or video tutorials, can be incredibly helpful in understanding the correct placement of your needle. Maintaining a steady pace and a comfortable working environment can significantly improve the accuracy of your stitch pickups. Take your time to align each stitch properly, avoiding any unnecessary twists or gaps that could disrupt the flow of the entrelac design.
How to Knit the Left and Right Triangles?
Creating the left and right triangles in entrelac knitting involves mastering specific techniques to form the distinctive left-leaning rectangles that contribute to the intricate texture of the pattern. When starting the process, it is crucial to carefully track your stitch counts and maintain precision as each row progresses. By ensuring that the number of stitches remains accurate, you lay a solid foundation for the successful creation of these geometric shapes. Paying close attention to shaping techniques, especially when turning the work for increasing or decreasing stitches, helps maintain the desired symmetry in the intricate design. Left-leaning rectangles indeed add a unique flair to the entrelac pattern, calling for focused steps to execute them with finesse.
How to Join the Triangles?
Seamlessly joining the triangles in your entrelac pattern is essential for maintaining a neat and visually appealing edge, requiring a proficient technique that ensures a smooth transition between components. One crucial aspect to consider when connecting the triangles is ensuring that the edges align perfectly, which can be achieved by picking up stitches in a consistent manner along each side. This helps in creating a uniform look and avoiding any gaps or puckering in the final piece.
Using the slip stitch method can aid in seamlessly joining the triangles. With this method, you slip stitches from the edges of the triangles onto a needle in a specific pattern, effectively linking the components without adding bulk or distorting the overall shape. It’s also beneficial to block each triangle before joining them, as this can help in achieving a more precise alignment and a polished finish. By blocking the triangles individually, you can ensure that they are all the same size and shape, facilitating easier assembly.
Achieving flawless transitions in your entrelac project hinges on employing the optimal technique for joining triangles, focusing on edge triangles and bind-off methods to ensure structural integrity and a clean edge. In terms of joining triangles in entrelac knitting, understanding the role of edge triangles is crucial. These triangles not only provide a smooth transition between segments but also add stability to the overall structure of your work. To create a polished finish, paying attention to the bind-off procedures is essential. Proper bind-off techniques can elevate the aesthetics of your project and give it a professional look.
How to Knit the Rectangles, Final Row and Bind Off?
Crafting the rectangles in entrelac knitting involves working on distinct square sections that interlock with the base triangles, forming a cohesive pattern structure enriched by the presence of edge triangles. These square segments play a pivotal role in adding complexity and elegance to the overall design. By meticulously connecting the edges of each square to the corners of adjacent triangles, knitters create a harmonious flow that visually enhances the entrelac fabric. The careful incorporation of edge triangles not only provides a polished finish but also ensures the stability and durability of the rectangles.
Concluding your entrelac knitting project involves knitting the final row and executing a precise bind-off technique, ensuring a seamless finish from the top-down approach that enhances the overall design. To complete the final row, work on the last tier just as you have been doing – picking up stitches from one block to another in a zigzag pattern. Take care to maintain the rhythm and flow of your entrelac pattern. Once you reach the end, it’s time to bind off securely. Use a stretchy bind-off technique like the Russian bind-off to ensure flexibility and a neat edge. Slip the stitches knit-wise, knit two stitches together through the back loops, and pass the slipped stitch over. Repeat until all stitches are bound off for a professional-looking edge.
What Are Some Tips for Perfecting Your Entrelac Knitting?
To enhance your entrelac knitting skills, consider incorporating tips such as maintaining tension consistency, exploring advanced techniques for intricate woven textures, and utilizing free patterns for creative inspiration. One effective way to refine your entrelac technique is to focus on improving your colorwork skills, as this can greatly enhance the overall visual appeal of your projects.
- Experiment with different color combinations to create stunning gradient effects within your entrelac squares.
- Incorporating different yarn weights and textures can add depth and dimension to your entrelac fabric, making it visually interesting and unique.
For those looking to expand their entrelac repertoire, exploring free online resources such as video tutorials and pattern libraries can provide a wealth of knowledge and inspiration.
What Are Some Common Mistakes to Avoid in Entrelac Knitting?
When engaging in entrelac knitting, it’s essential to steer clear of common pitfalls like inconsistent tension, misaligned color changes, and complex patterns like entrelac socks or argyle kilt-sock designs. One prevalent error in entrelac knitting that crafters often encounter is the challenge of maintaining consistent tension throughout the project. This can result in uneven blocks and an overall untidy look to the intricate entrelac design. To avoid this issue, try using a slightly different needle size or adjusting your knitting technique to achieve uniform tension across all blocks. Pay close attention to yarn tension when picking up stitches along the sides of the blocks to ensure a smooth and even finish.
Another common mistake is the abrupt color transitions that can disrupt the fluidity of the entrelac pattern. To prevent this, plan your color changes in advance and consider using a gradient yarn to achieve a seamless transition between blocks. Weaving in ends neatly and strategically can also help maintain the visual continuity without creating distracting color jumps. When tackling intricate designs like entrelac socks, beginners may find the construction process overwhelming. To navigate this complexity effectively break down the pattern into smaller sections and focus on mastering each block before moving on to the next. Use stitch markers to keep track of your progress and prevent mistakes in the intricate stitch work of entrelac knitting.
How to Finish and Block Your Entrelac Knitting Project?
Completing and blocking your entrelac knitting project is a critical step that involves showcasing the woven appearance of the pattern and adhering to expert guidelines for achieving professional results, as advised by Laura Barker. After you have completed the final rows of your entrelac project, it is time to move onto the blocking process. Blocking is a crucial step in knitting as it helps to even out the stitches, open up the lacework, and give your project a polished look. To start, you will need to gently soak your entrelac piece in lukewarm water with a bit of wool wash for around 20 minutes. Once your project is thoroughly soaked, carefully remove it from the water and gently press out excess water without wringing or twisting the fabric. Next, lay your piece on a clean towel and roll it up to squeeze out more water. Now comes the crucial part – shaping your entrelac project.
How to Maintain Even Tension in Entrelac Knitting
Maintaining even tension throughout your entrelac knitting project is crucial for achieving a polished and professional-looking final product. Uneven tension can lead to irregular stitches, bumpy textures, and a finished piece that does not lay flat or align correctly. This aspect of knitting can be particularly challenging in entrelac, due to the frequent turning and handling of the work as you create separate blocks and triangles. Here are steps and strategies to help you keep your stitches even and your tension consistent throughout your project.
Firstly, it’s important to select the right type of yarn and needles. Yarns that are too slippery or too grabby can affect how evenly your stitches form. Similarly, the type of needles you use—whether they’re wood, metal, or plastic—can influence your grip and the flow of yarn. Experimenting with different combinations can help you find the most comfortable setup that promotes even tension.
Begin by practicing with a sample swatch. Before you start your main project, knitting a few practice swatches can help you get a feel for handling the yarn and needles together. This is especially useful if you are trying a new type of yarn or needle material. Focus on keeping your stitches consistent in size; not too tight and not too loose. This practice helps build muscle memory, which is beneficial for maintaining tension over longer periods.
When knitting, pay attention to how you hold the yarn and needles. Everyone has a unique knitting style, and finding a comfortable and effective method for yourself is key. Whether you prefer to knit English style (yarn in the right hand) or Continental style (yarn in the left hand), ensure that the yarn flows freely through your fingers and that you are not pulling it too tightly after forming each stitch. Adjustments in your grip or the way you wrap the yarn can significantly impact your tension.
Another tip is to frequently pause and review your work. Entrelac requires turning your work often, which can sometimes lead to tighter stitches at the turns if you’re not careful. By stopping every few rows to check the consistency of your stitches, you can catch and correct any discrepancies in tension early on. This is also a good time to stretch your hands and relax your grip if you find yourself knitting tightly.
Keeping your work on the needles organized can also help manage tension. As entrelac involves multiple small segments and lots of stitch picking, using stitch markers to delineate different sections of your work can prevent pulling or bunching at the transitions. This organization aids in visually inspecting the evenness of your tension throughout the project.
In addition, consider the ergonomic aspects of your knitting environment. Ensure that you are sitting comfortably with adequate lighting and that your posture supports long periods of knitting without strain. Discomfort can lead to tightening up, which directly affects how you handle the yarn and needles.
Finally, regular practice and patience are vital. Entrelac knitting, with its complex structure of interlocking triangles and rectangles, can be challenging. The more you knit, the more familiar you will become with the technique, and the easier it will be to maintain even tension throughout your work. Don’t be discouraged by initial unevenness; with time and experience, your ability to control tension will improve.
By focusing on these areas—selecting the right materials, practicing, adjusting your grip and style, checking your work, organizing your stitches, ensuring ergonomic knitting conditions, and committing to regular practice—you will enhance your skills in maintaining even tension in entrelac knitting. This will lead to beautifully crafted projects that look expertly made and feel satisfying to complete.

